Clutch Installation
SAFETY FIRST: Protective gloves and eyewear are recommended at this point.


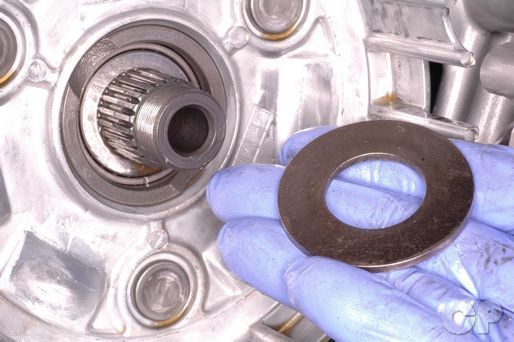
Place the thrust washer on the mainshaft so that its flat side faces out from the engine.


Place the clutch basket onto the mainshaft.


Coat the needle bearing in fresh engine oil and insert it over the mainshaft and into the clutch basket. Insert the spacer between the needle bearing and mainshaft.
Push the bearing and spacer into the clutch basket and install the thrust washer.
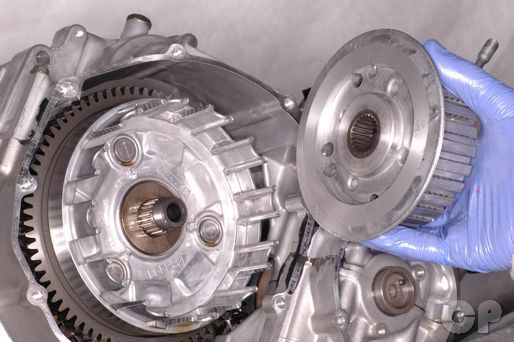
Place the clutch hub onto the mainshaft.
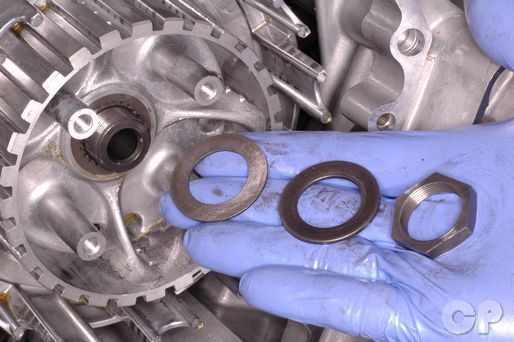
Place the wave washer and lock washer onto the mainshaft. Thread the clutch hub nut onto the mainshaft so that its flat side faces the lock washer.
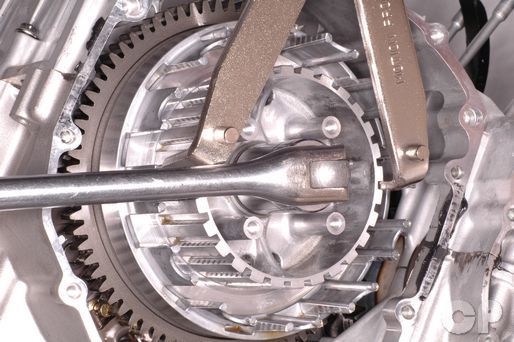
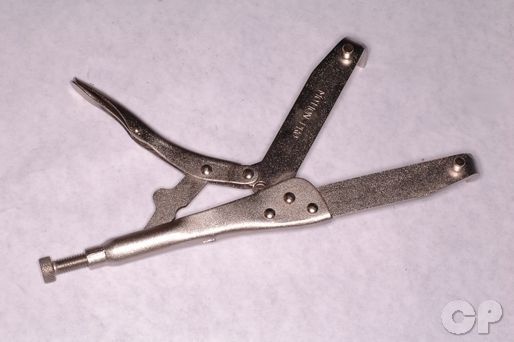
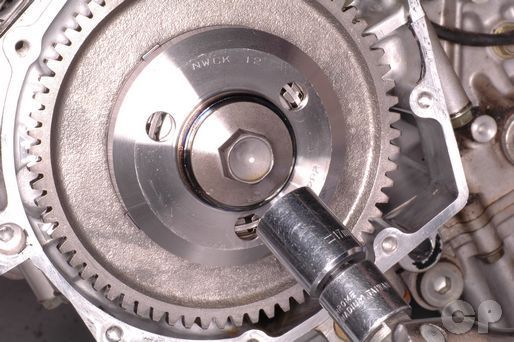
Hold the clutch hub with a clutch center holder and torque the nut to specification with a 27 mm socket.
| Model | N-m | lb-ft |
| 600 | 60 - 80 | 43.5 - 58.0 |
| 750 | 80 - 100 | 58.0 - 72.5 |
Special Tool-
Clutch Sleeve Hub Holder: 09920-53740
Order Special Tool Here! http://www.repairmanual.com/catalog/150465
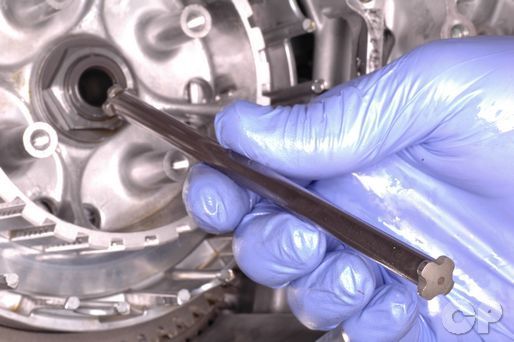
Coat the large clutch push rod in Suzuki Super Grease "A." Install the small push rod if it was removed. See the Countershaft Sprocket topic for more information.
Suzuki Super Grease "A" - 99000-25030


Lubricate the clutch push piece and clutch release needle bearing in fresh engine oil. Insert the push piece into the mainshaft. Place the needle bearing and washer on the clutch push piece.


Thoroughly coat the clutch plates in fresh engine oil.
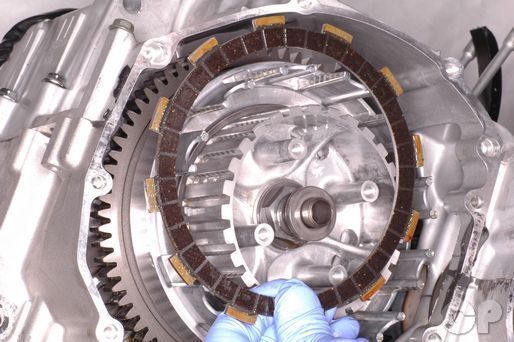
On the 1989 - 1991 Katana 600 models install the a friction disc and then a steel disc. Continue alternating friction plates with steel discs until they are all installed into the clutch basket. There should be a steel disc between all of the friction plates.


On the other models install a steel disc first and then the single No. 2 friction plate. Next install a steel disc. Continue alternating No. 1 friction plates with steel discs until they are all installed into the clutch basket. There should be a steel disc between all of the friction plates.
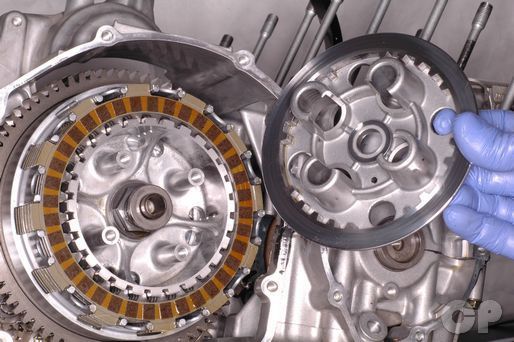
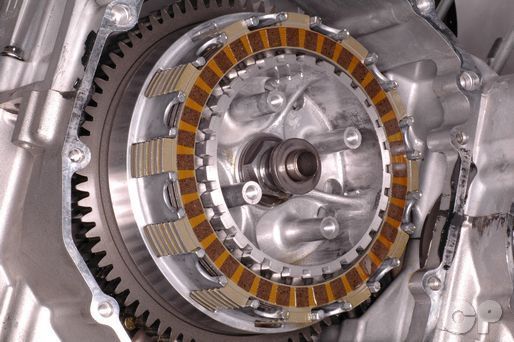
Install the pressure plate.


Install the four clutch springs and clutch spring bolts.
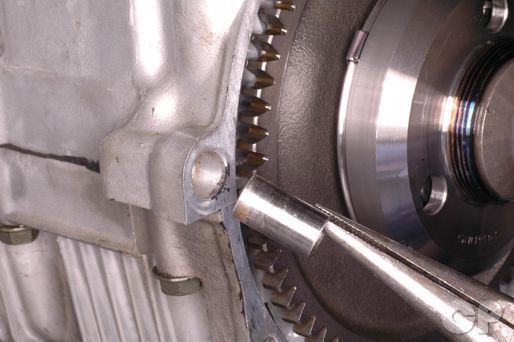
Hold the starter clutch with a starter clutch holder. If you do not have a starter clutch holder you can hold the bolt with 17 mm socket.
Special Tool- Starter Clutch Holder: 09920-34810
If the starter clutch bolt loosens tighten it to specification with a 17 mm socket.
(Starter Clutch Bolt Torque: 150 N-m or 108.5 lb-ft)
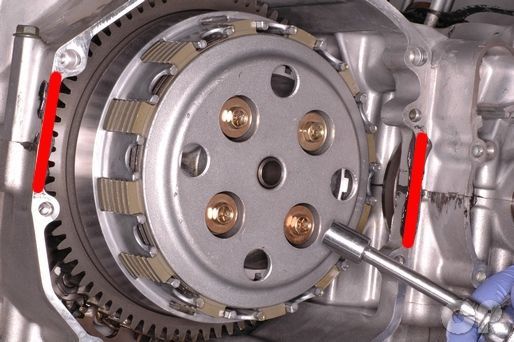
Tighten the clutch spring bolts a small amount at a time in a crisscross manner. Torque the bolts to specification with a 10 mm socket.
(Clutch Spring Bolt Torque: 12 N-m or 8.5 lb-ft)
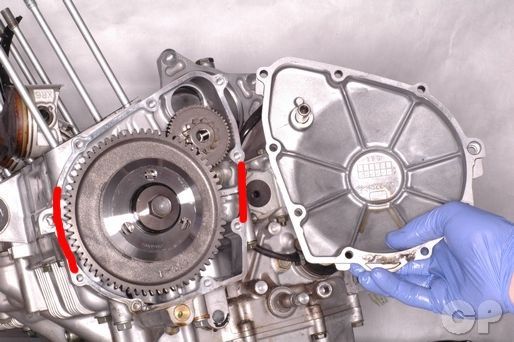
Apply Suzuki Bond to the crankcase as indicated by the red markings.
Suzuki Bond 1207B - 99104-31140
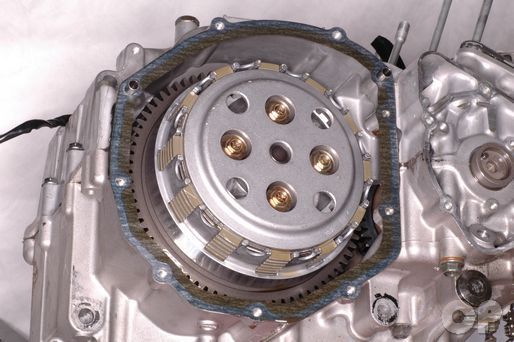


Install the two dowel pins and a new clutch cover gasket.


Install the clutch cover. Insert the nine clutch cover bolts. Use new sealing washers with the two bolts that go in the forward most positions. Tighten the bolts securely with a 5 mm Allen.
Install the left crankcase cover dowel pin.
Make sure the left crankcase cover mating surface is clean. Apply Suzuki Bond or an equivalent silicone sealant to the areas of the crankcase as indicated by the red lines.
Suzuki Bond 1207B - 99104-31140


Install a new left crankcase cover gasket. Fit the left crankcase cover to the crankcase. Make sure the starter idle gear fits onto its shaft properly.


Install the nine left crankcase cover bolts.


The farthest left bolt is longer than the rest. Install an new sealing washer with the top left bolt. Tighten the left crankcase cover bolts securely with a 5 mm Allen.
Adjust the clutch cable free play. See the Clutch Cable Adjustment topic for more information.
Fill the engine oil. See the Engine Oil topic for more information.
Install the upper fairings. See the Upper Fairings topic for more information.
Copyright 2025 - Cyclepedia Press LLC

Note: If you are viewing this document offline be sure to visit the latest version online at http://www.cyclepedia.com before attempting any repairs. Updates are made without notice.